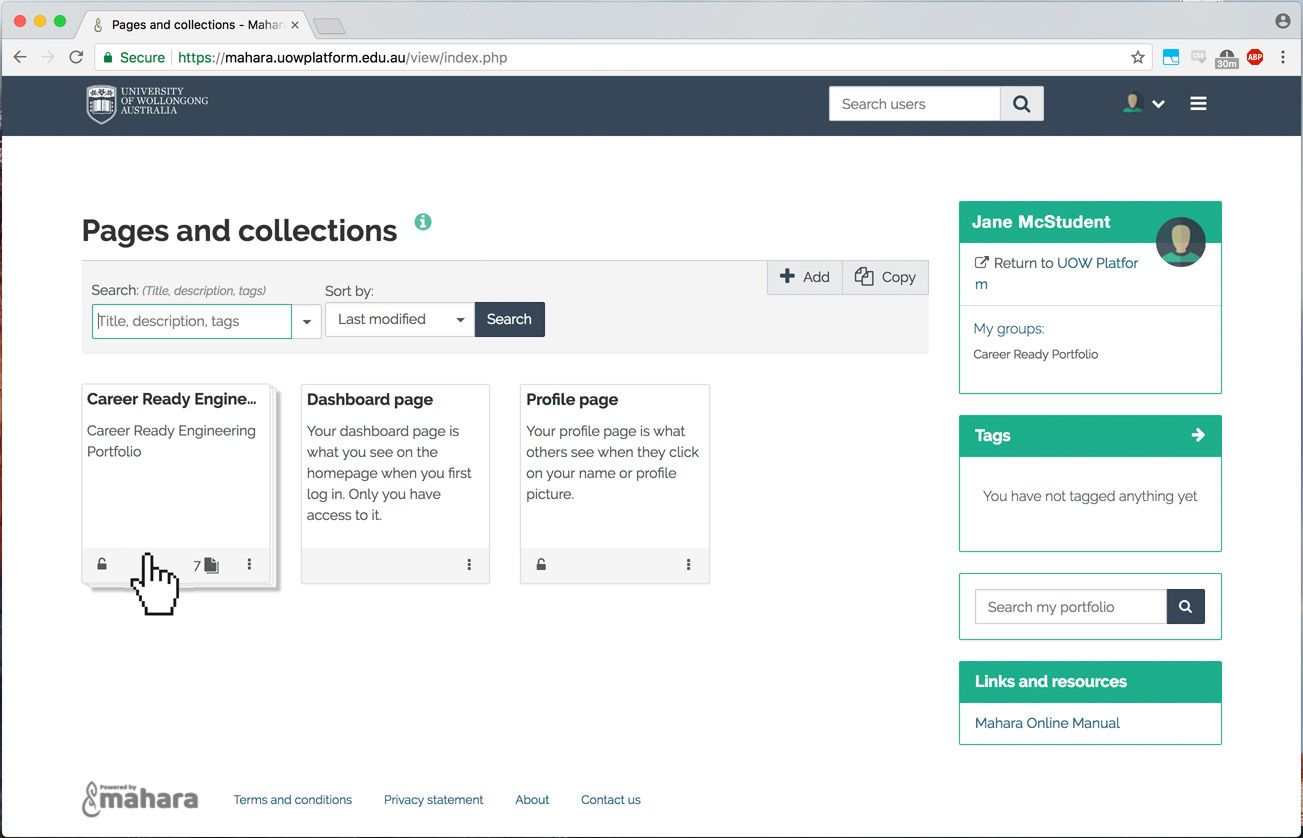
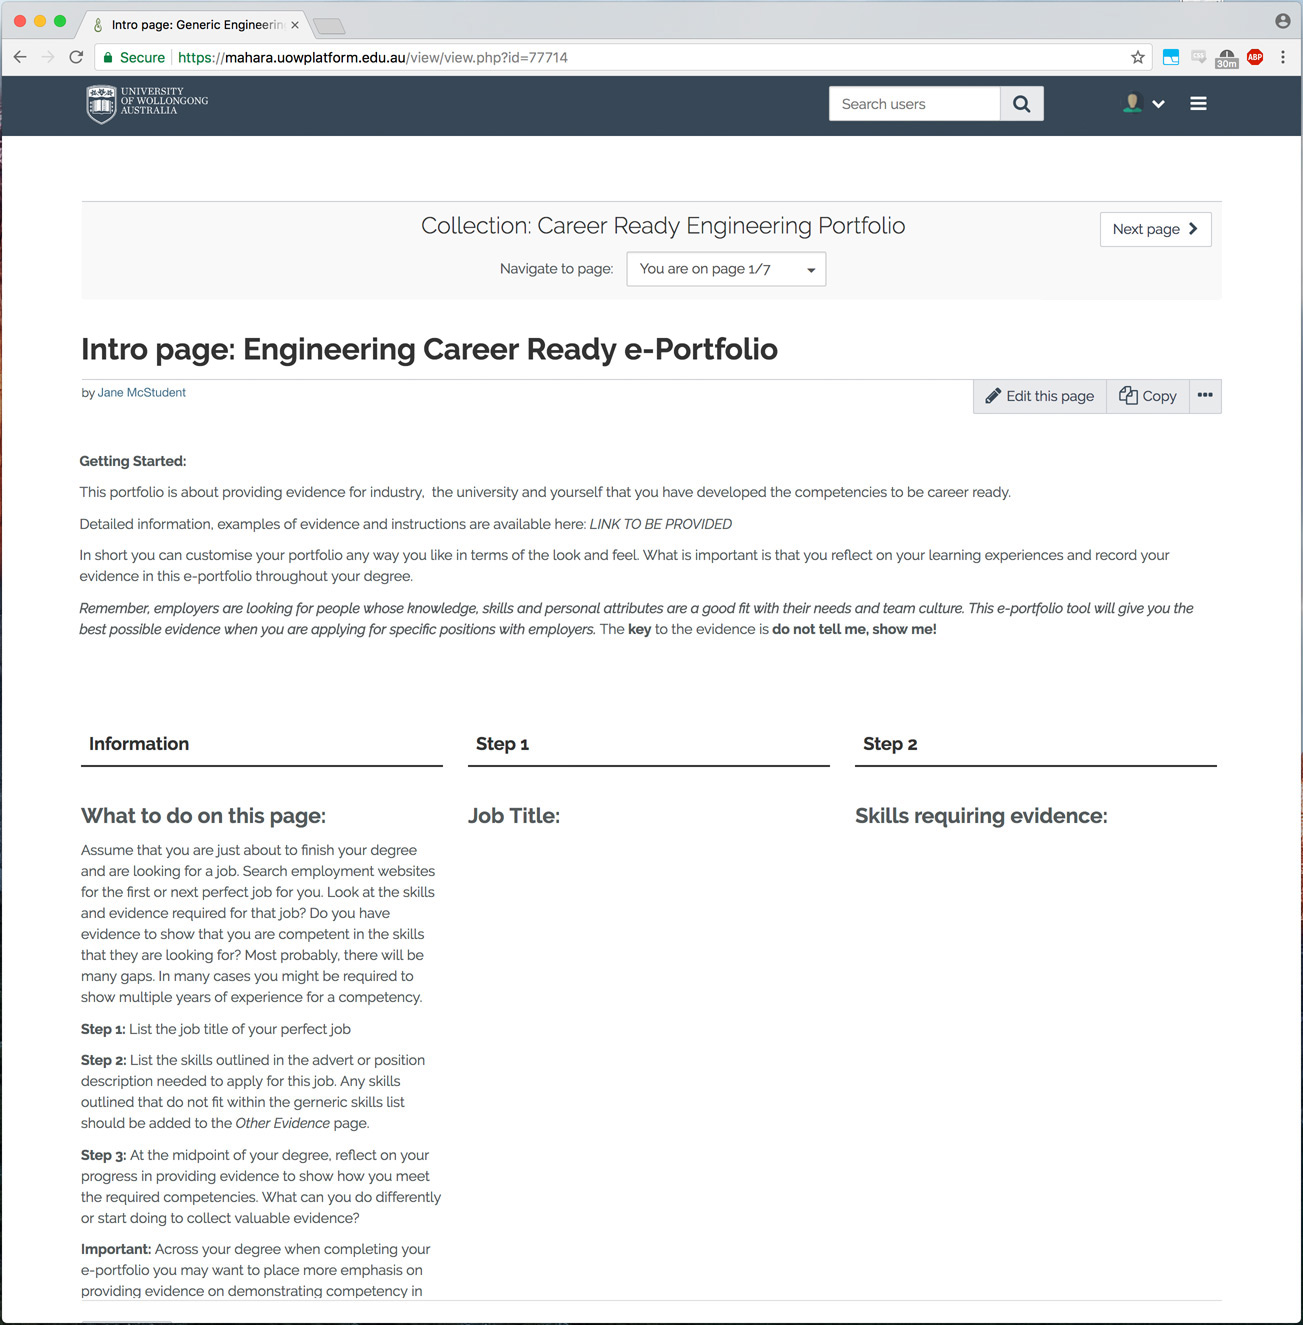
Editing text areas
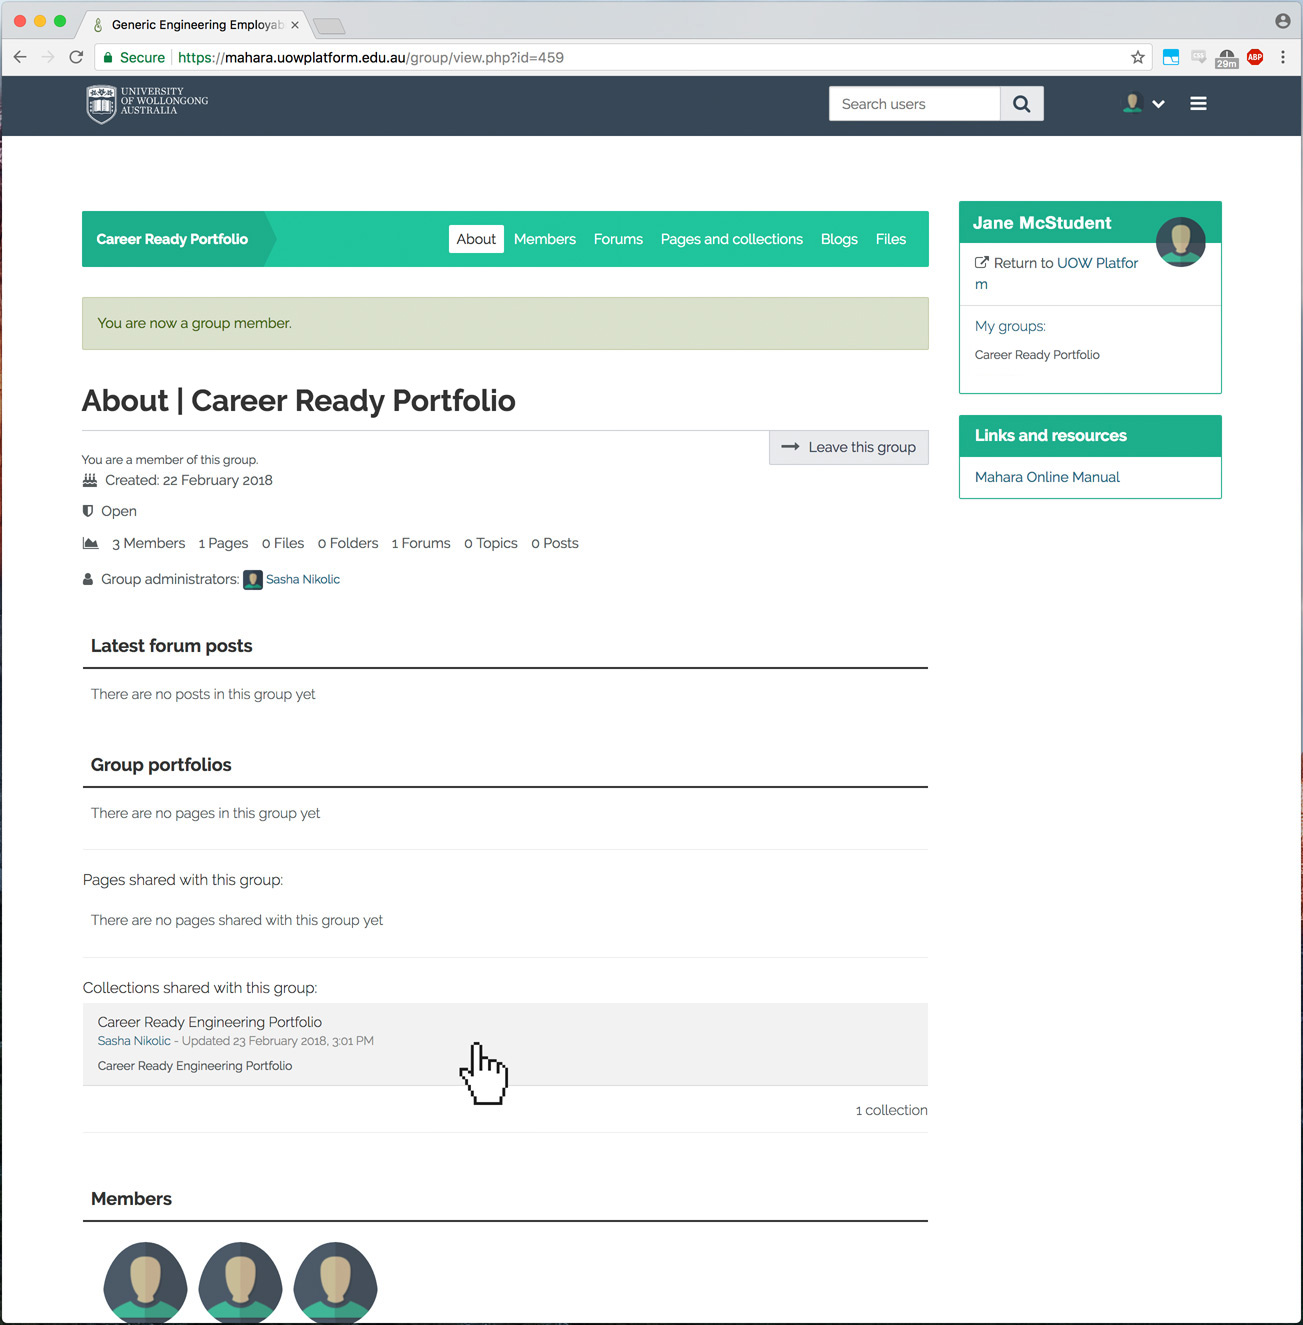
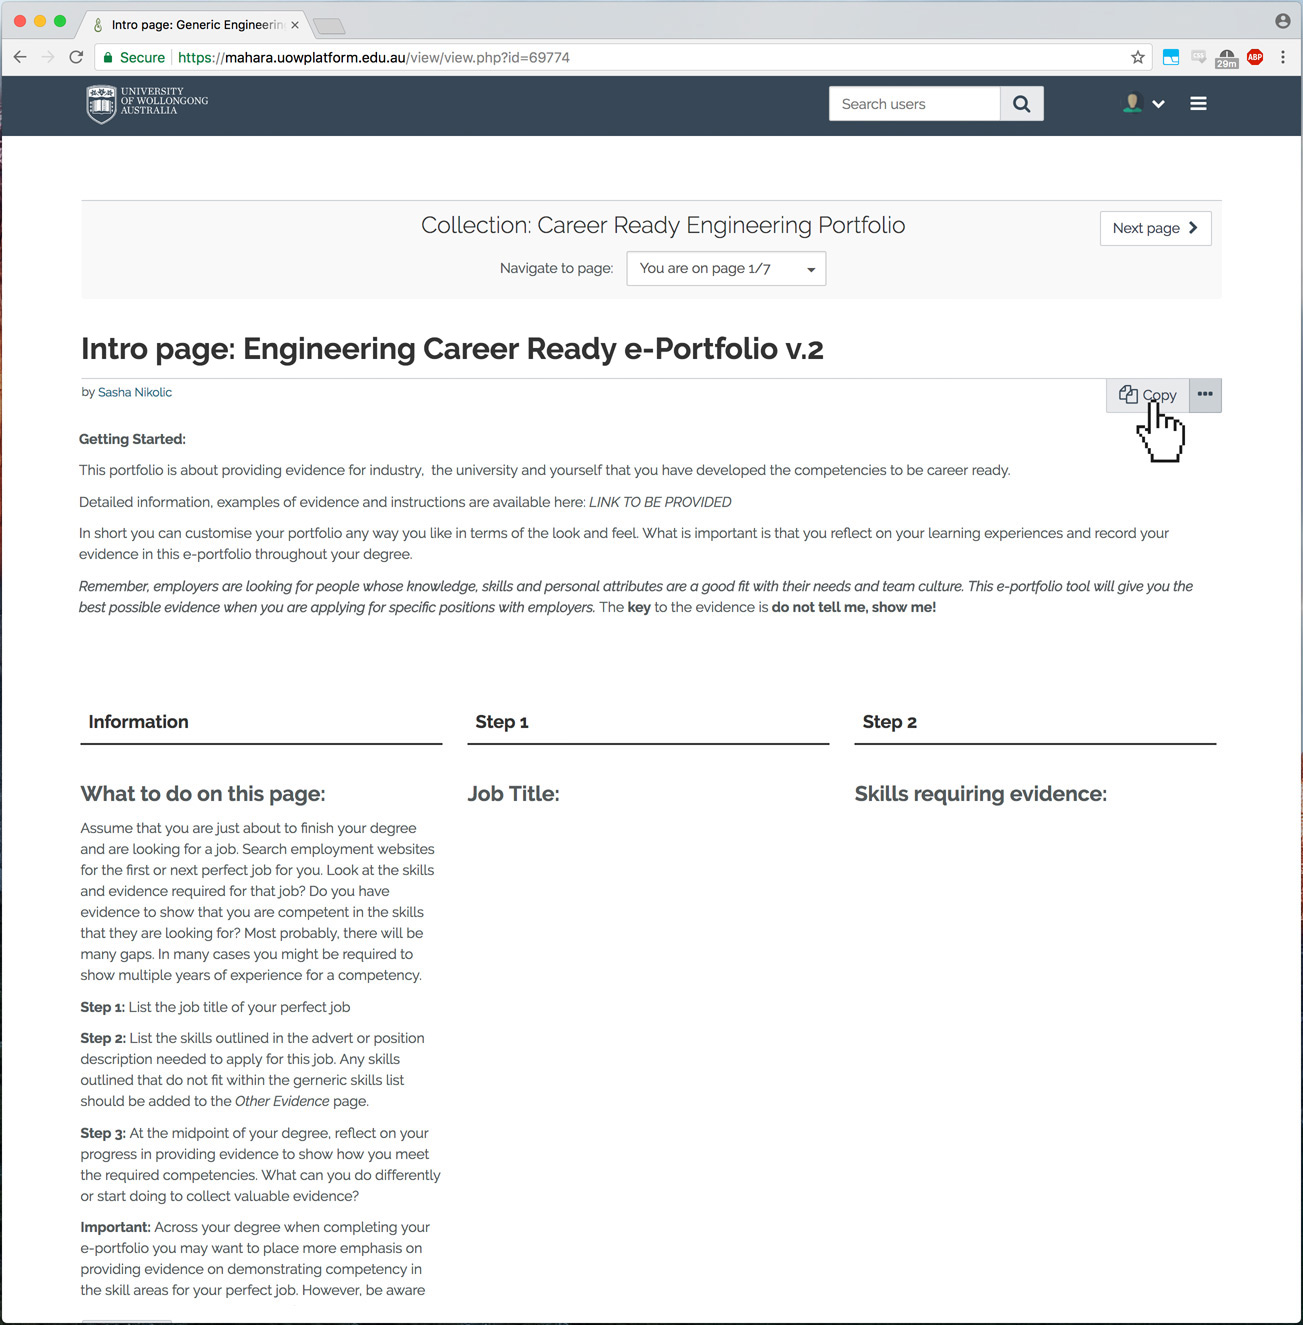
After going to your Collection, click the "Edit this page" button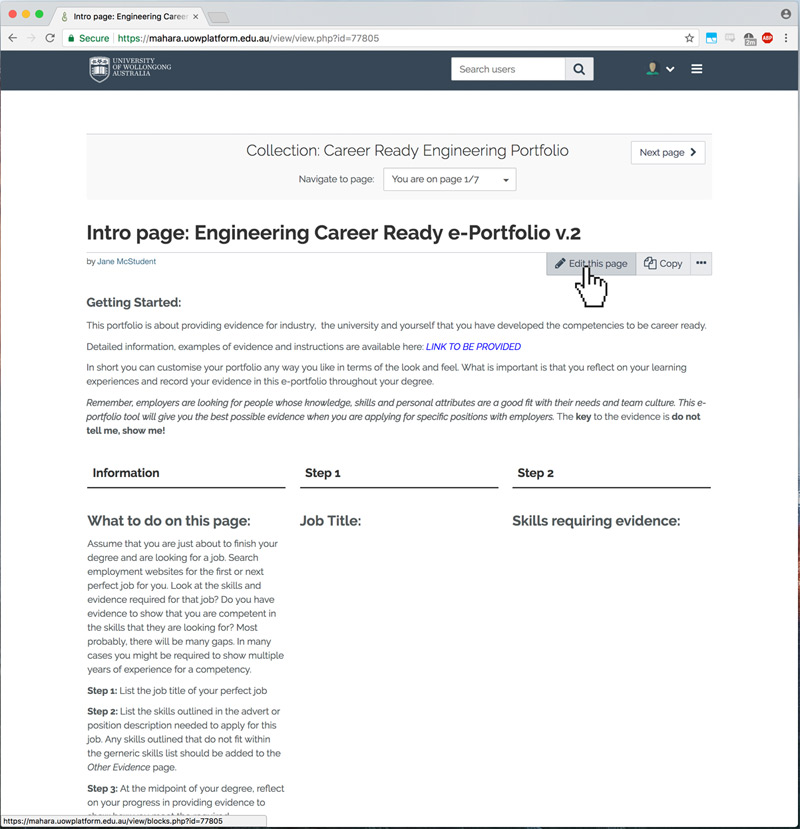
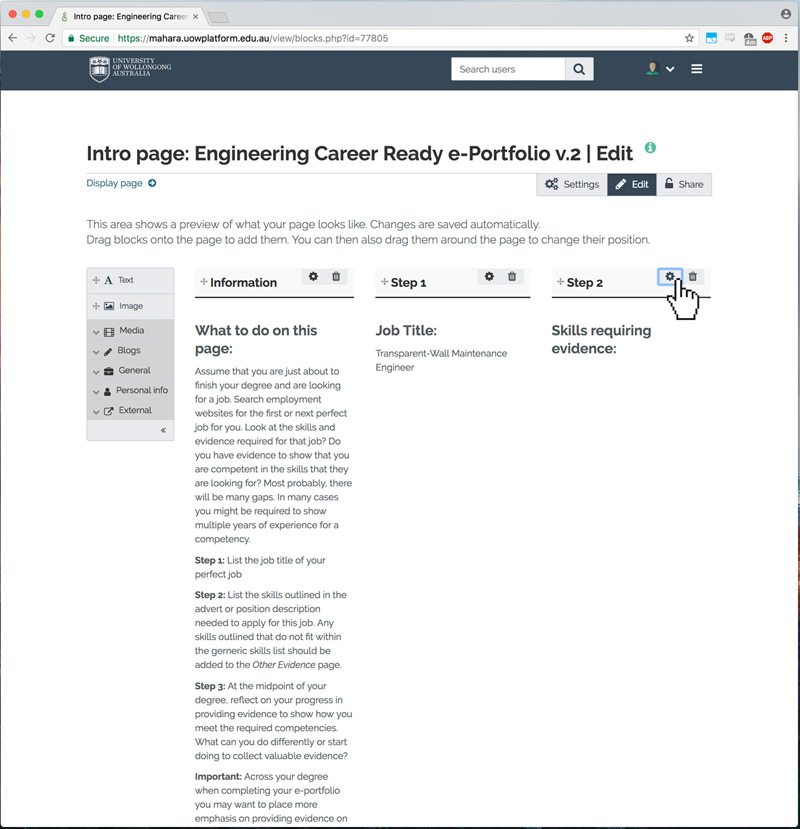
As you can see below, this page is divided into columns. To edit a specific column, click on the little cog icon button for the area you wish to edit.
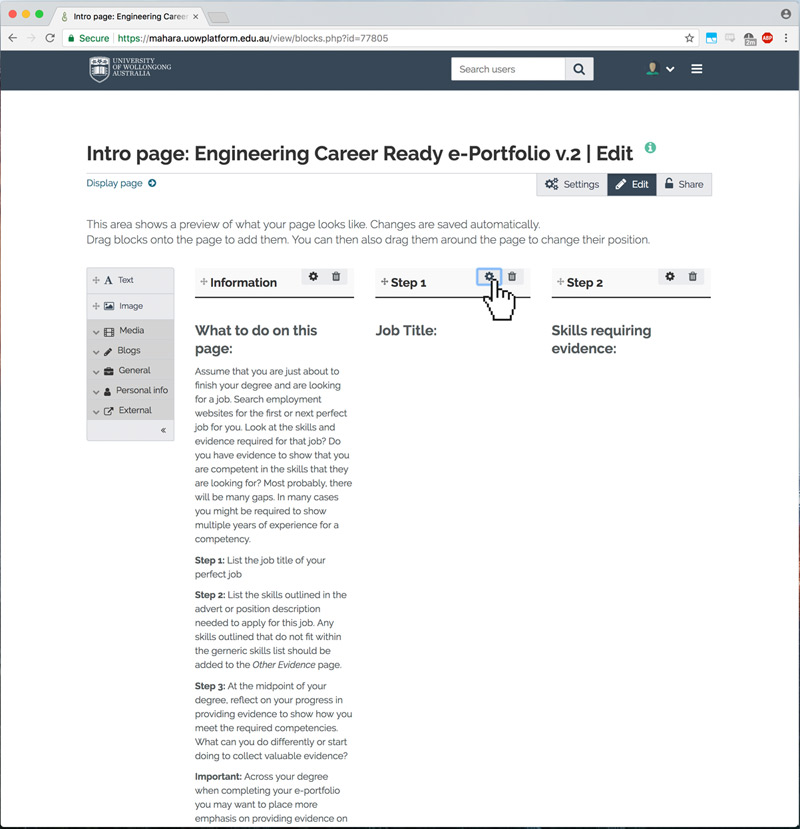
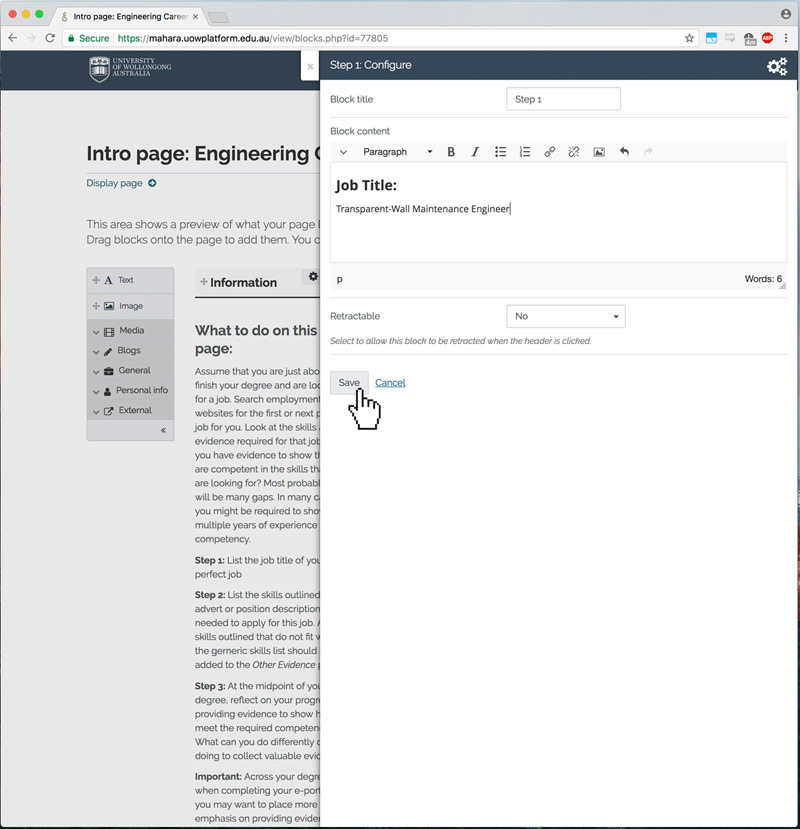
You can type your desired text, in this case a job title, into the field as shown.
Then click save to save and exit the edit panel.
You will see your updated content.
The same process can be used to fill in other areas.
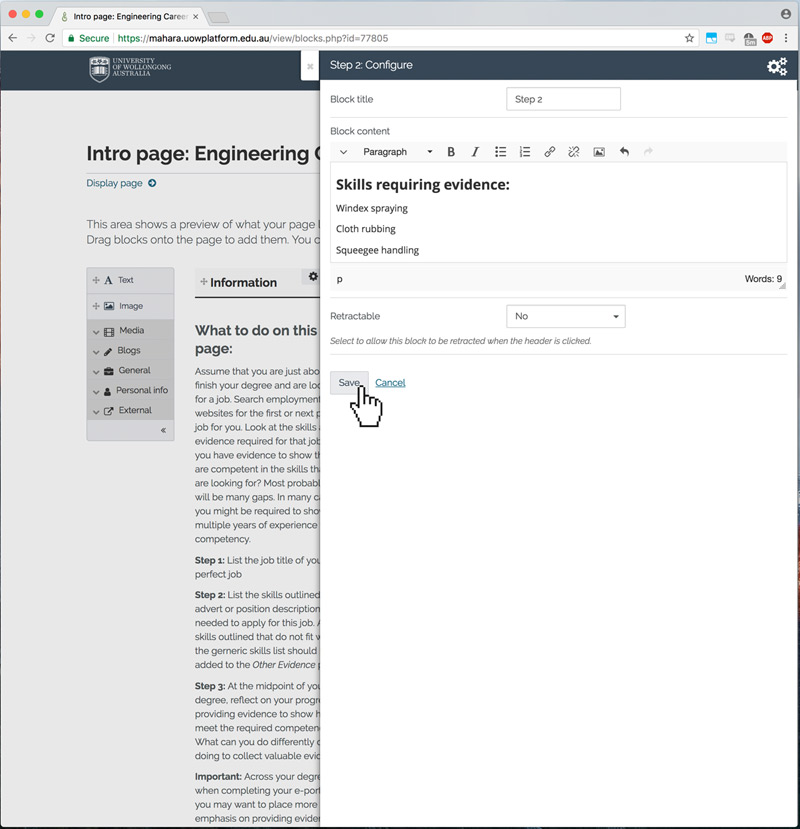
To get out of the editing mode entirely and see your completed changes, click the "Display page" button at the bottom of your page.
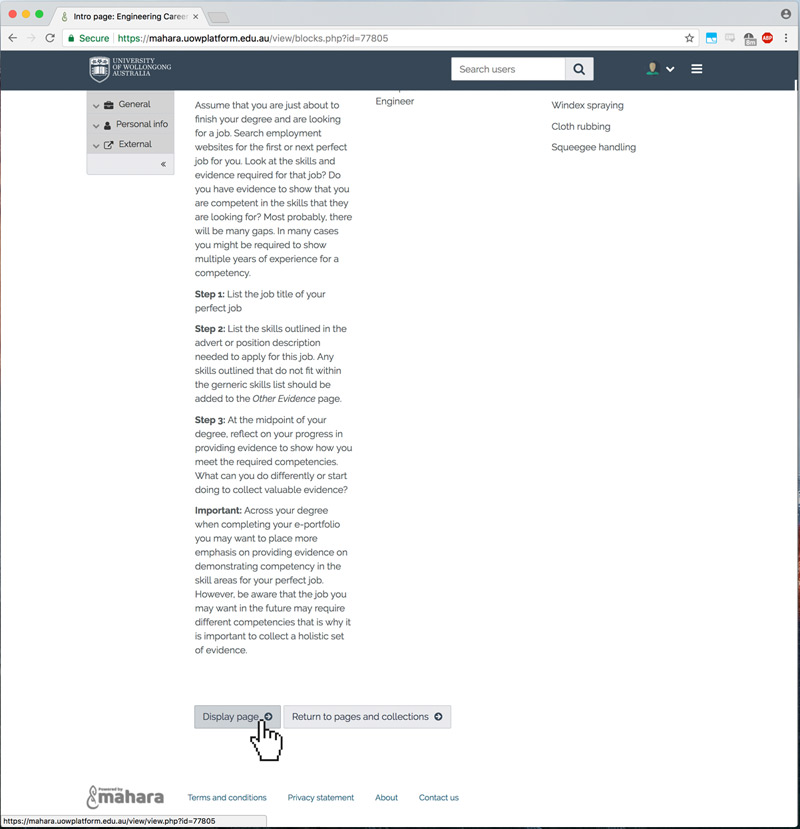
You will now see your completed edits.
Embedding files/content
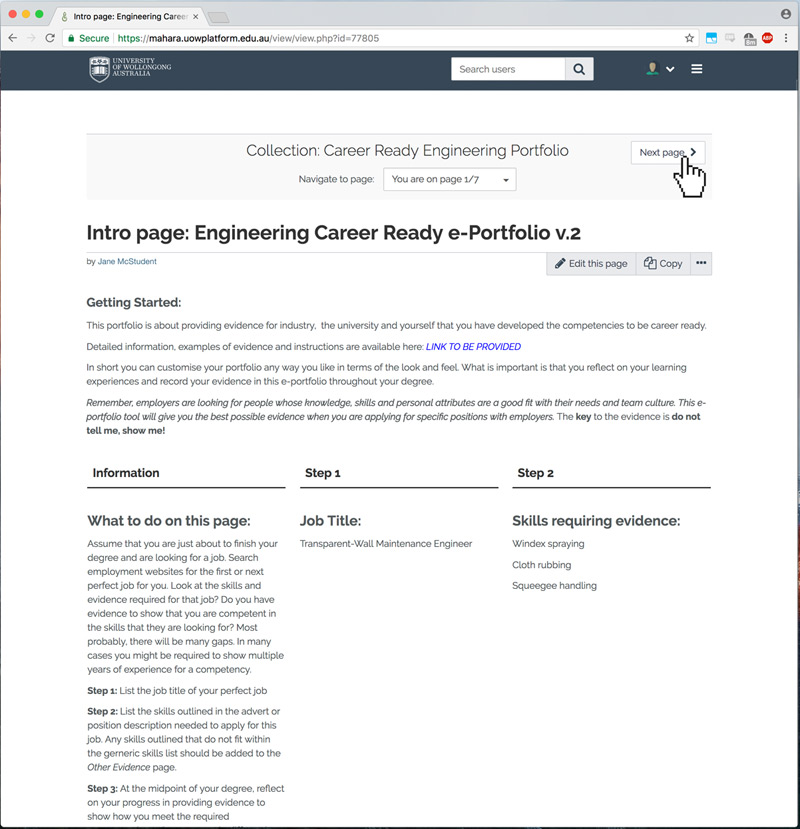
To go to another page, you can click the "Next page" button at the top of your page.
Again, just click the "Edit this page" button.
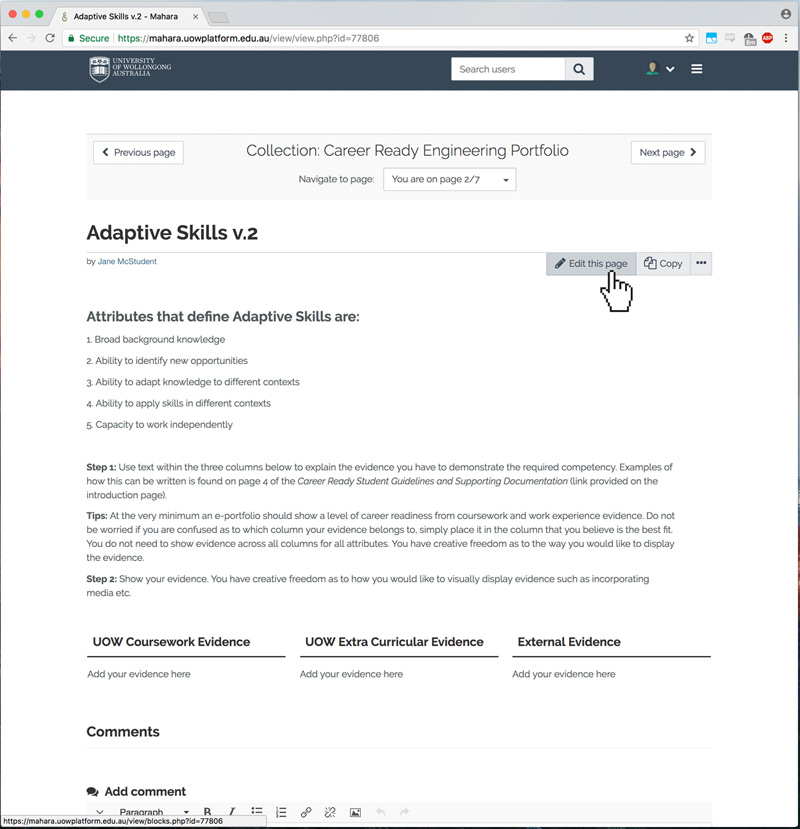
This page, for example, is also divided into columns.
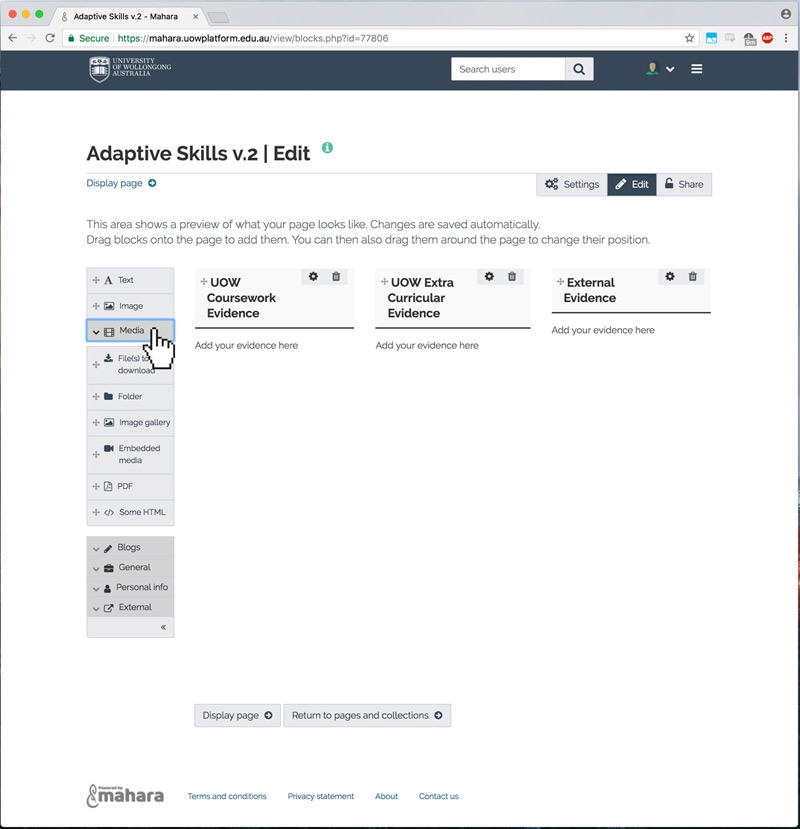
You will note to the left is a menu bar that shows different types of items you can add to your pages.
Let's imagine we wish to embed a PDF file in this page.
Click on the "Media" button to show a drop down menu of different media files that can be added.
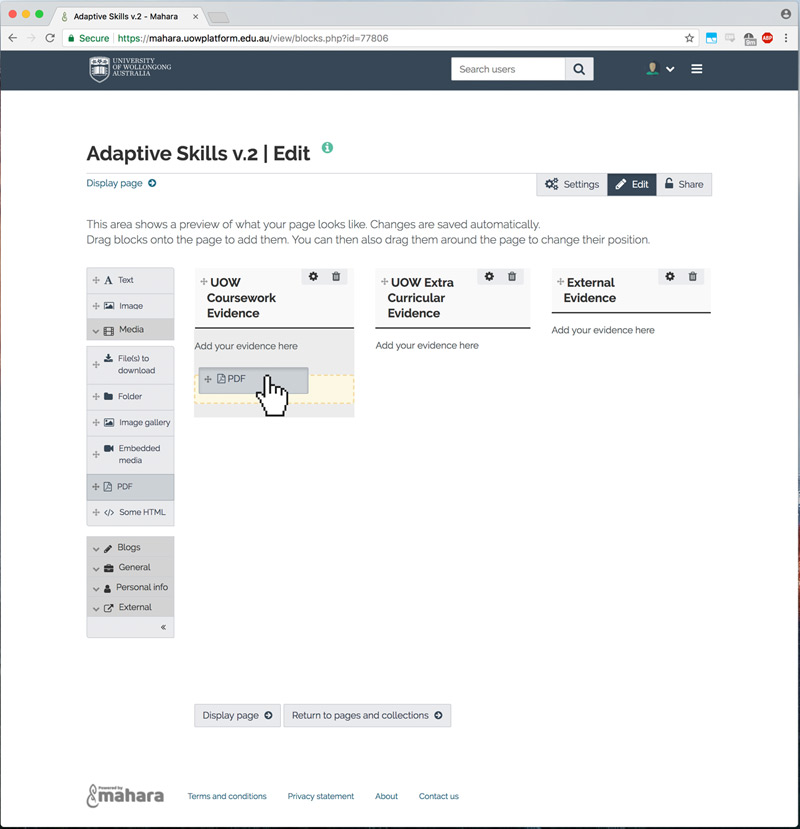
You can then drag and drop the "+ PDF" element into the area of the page you wish to add it to.
The yellow area denotes where it will go when you drop the item.
After dropping the PDF element into the location you wish to add it, you will be presented with a configuration panel where you can upload and change settings for the item you are adding.
Click on the dropdown bar as shown to expand.
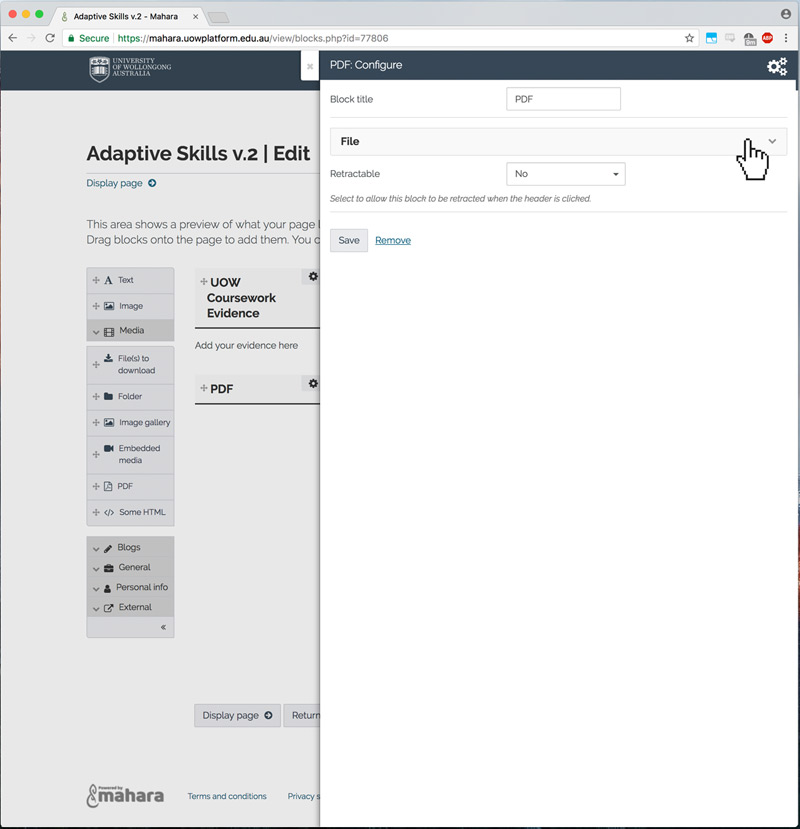
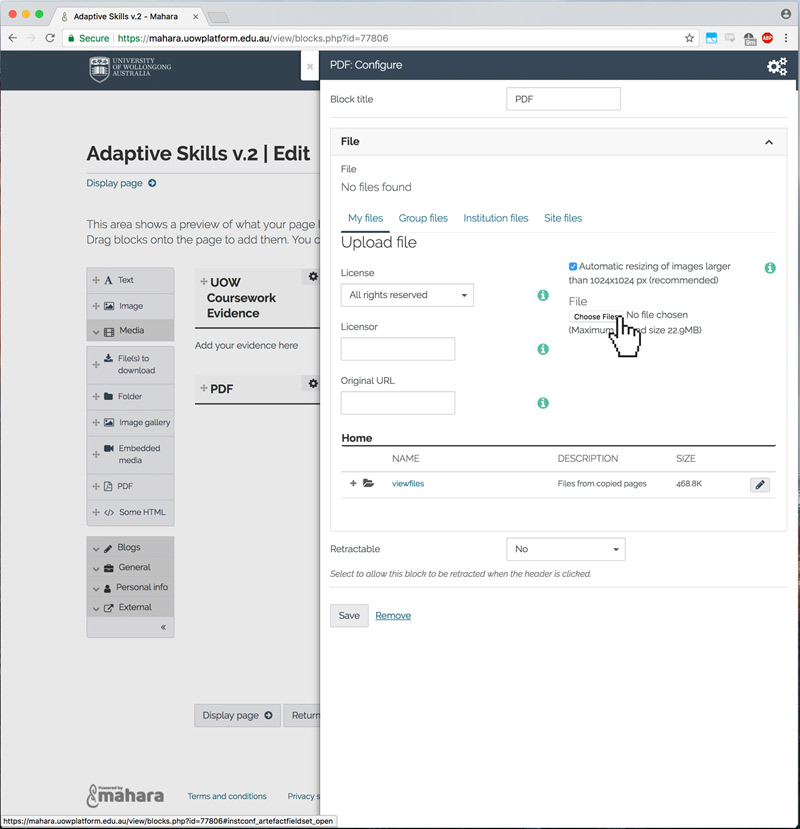
After clicking this bar you will be presented with a range of other settings and fields. You can configure these as suits you. In this instance we will upload a PDF file from our local computer into Mahara to embed it within this portfolio collection page.
Click on the "Choose Files" button. (this interface may vary depending on your browser and/or operating system, but the steps are much the same)
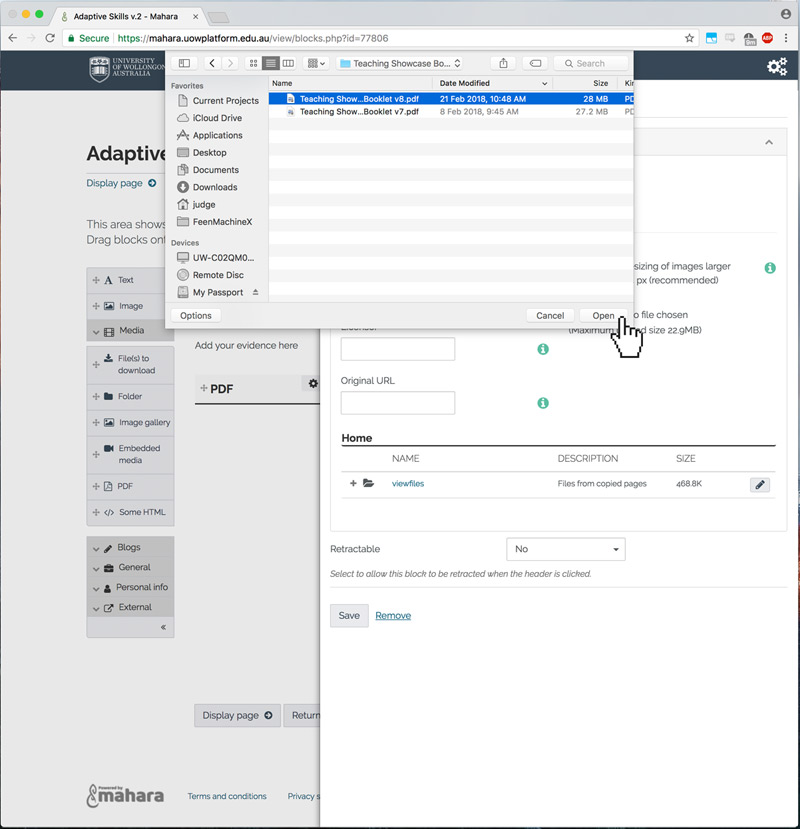
Select your file from where it resides on your computer. (this interface may vary depending on your browser and/or operating system)
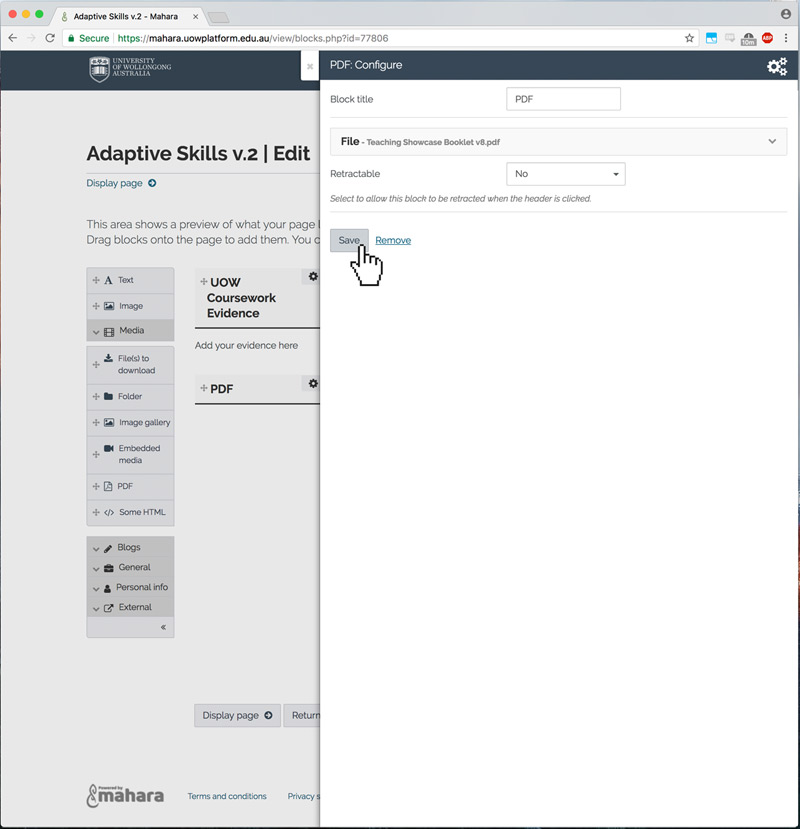
The file will then upload.
After it has done so, click the "Save" button.
The PDF file is now embedded within your page. (the cropping seen here is because we are in edit mode, it will expand to a suitable width after exiting edit mode)
Additionally you can add different media here, or add items as downloadable files, rather than embedding them for display, by using the "Files to download" element.
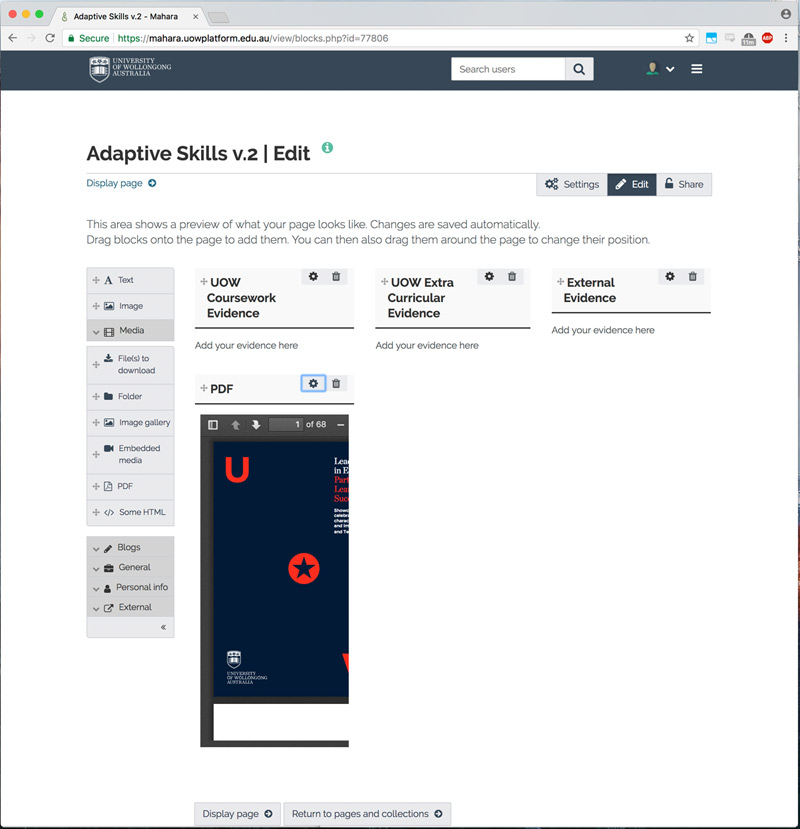
Lets for example add an image. Again, drag an image element to a location on the page.
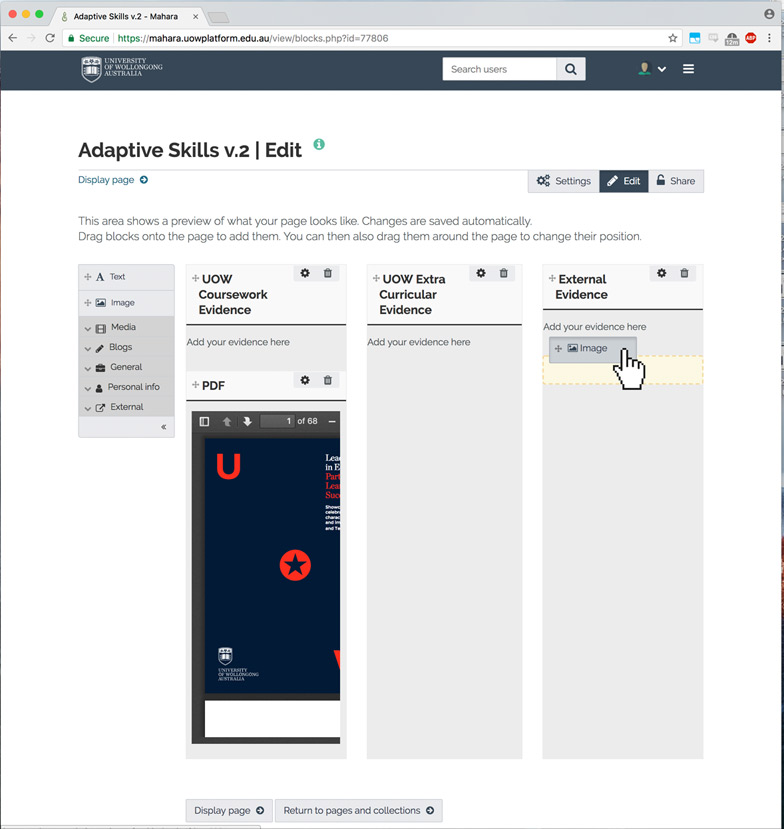
The steps are much the same as a PDF, or any other element you need to upload.
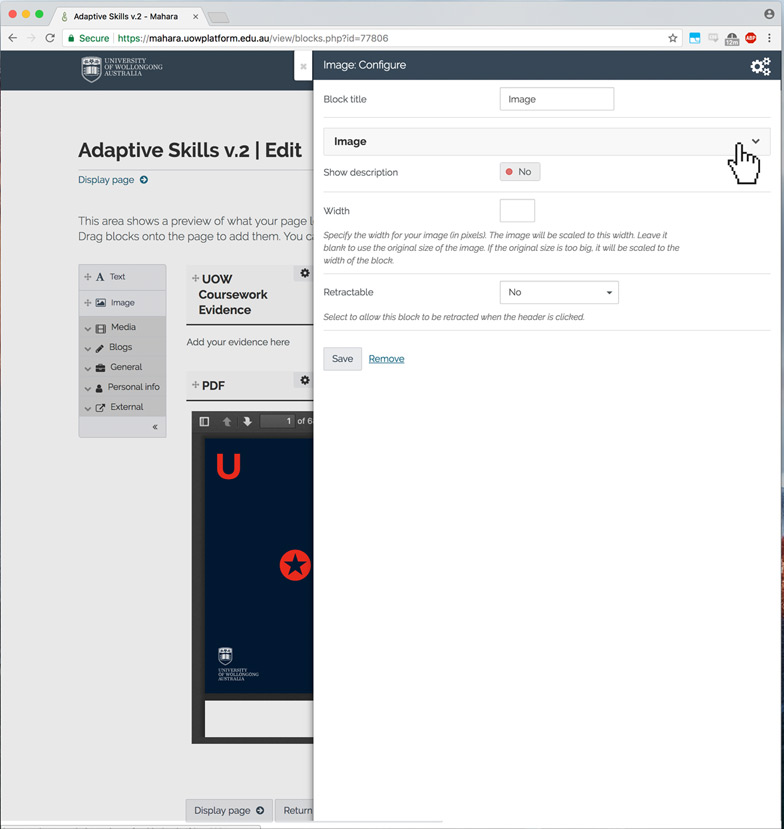
Expand the dropdown area as shown.
Click the "Choose files" button.
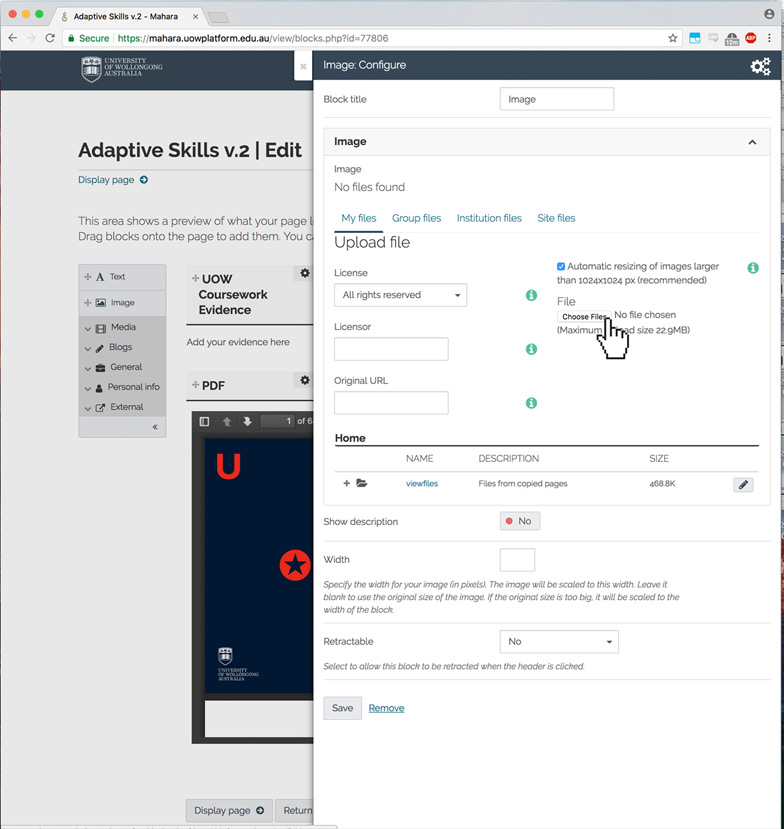
Select your image from your computer.
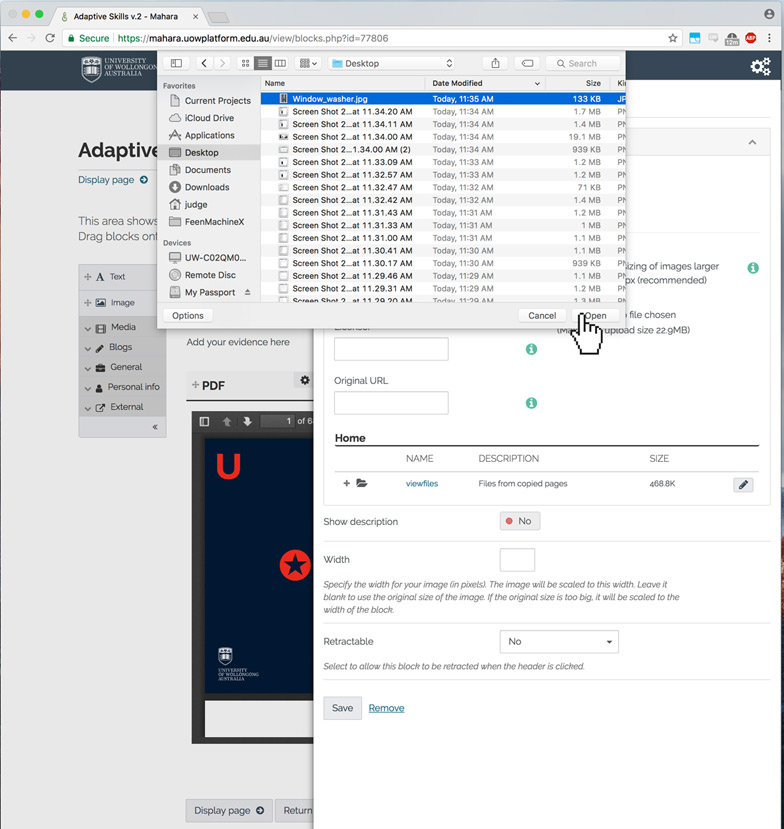
The file will upload into Mahara.
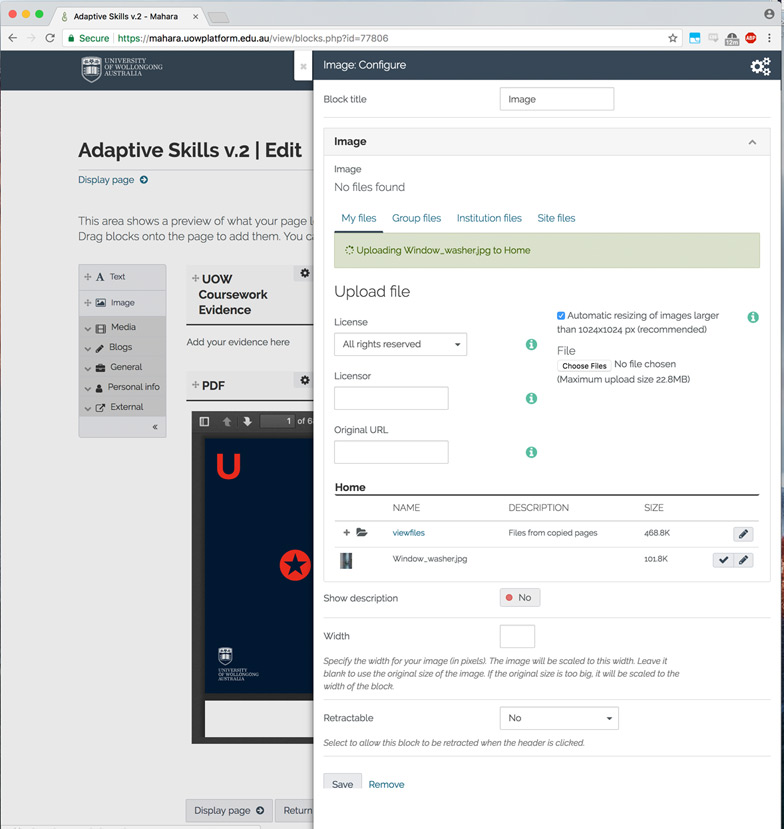
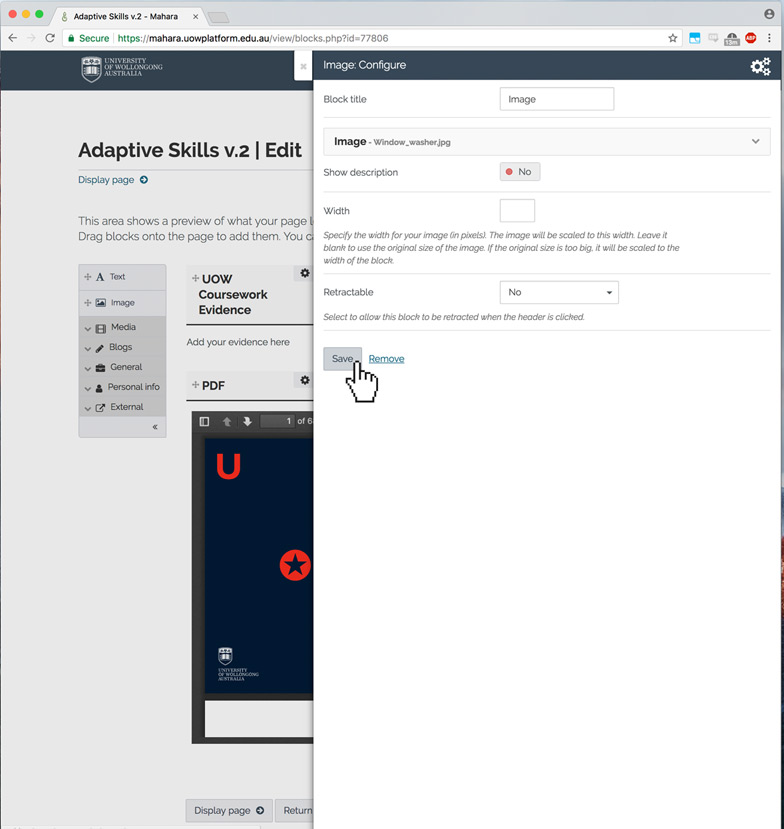
Click save after it has uploaded.
And you should see the image now embedded within your page.
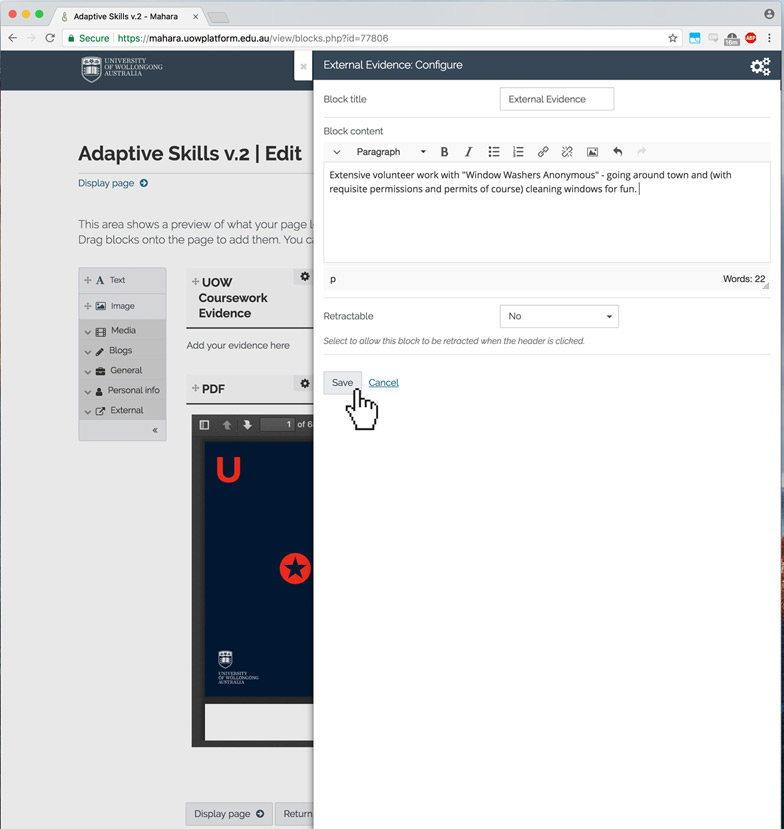
You can also add new text areas by dragging and dropping them, or edit existing text areas the same way as you did on the previous page.
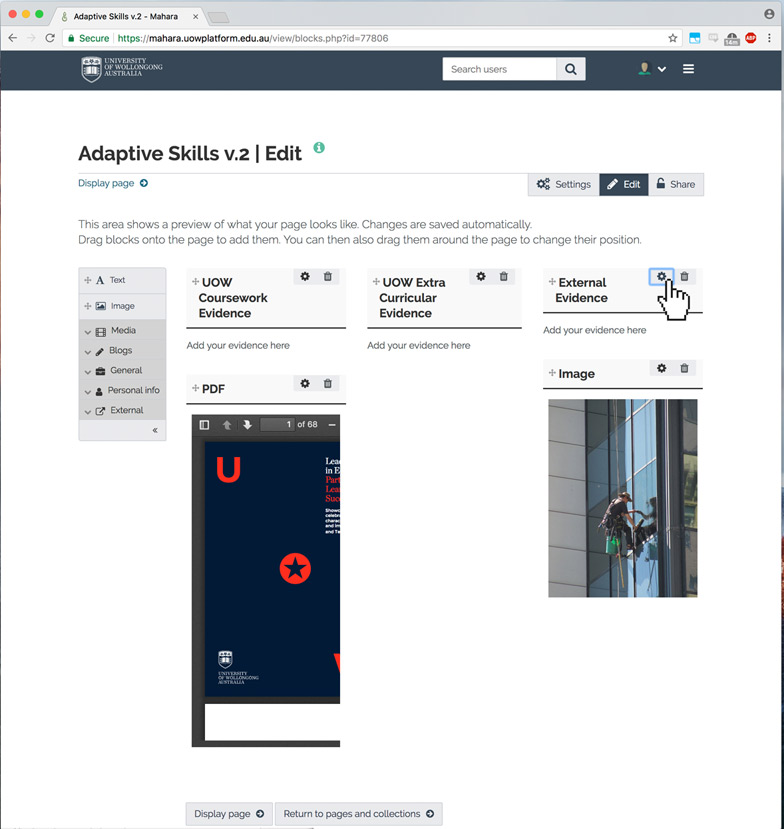
After clicking the cog icon button, you can edit the text field.
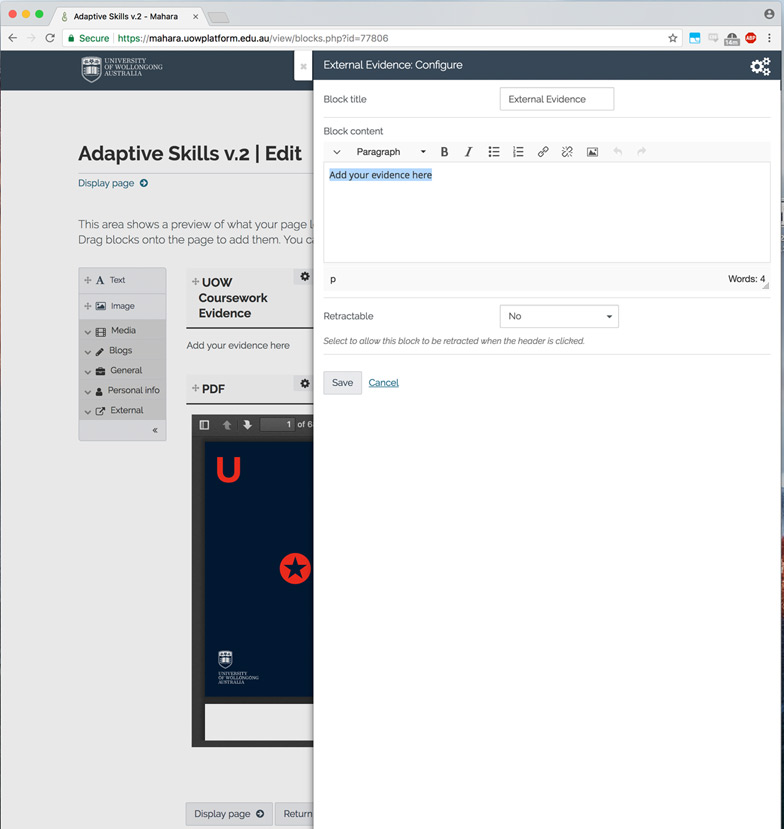
And click Save.
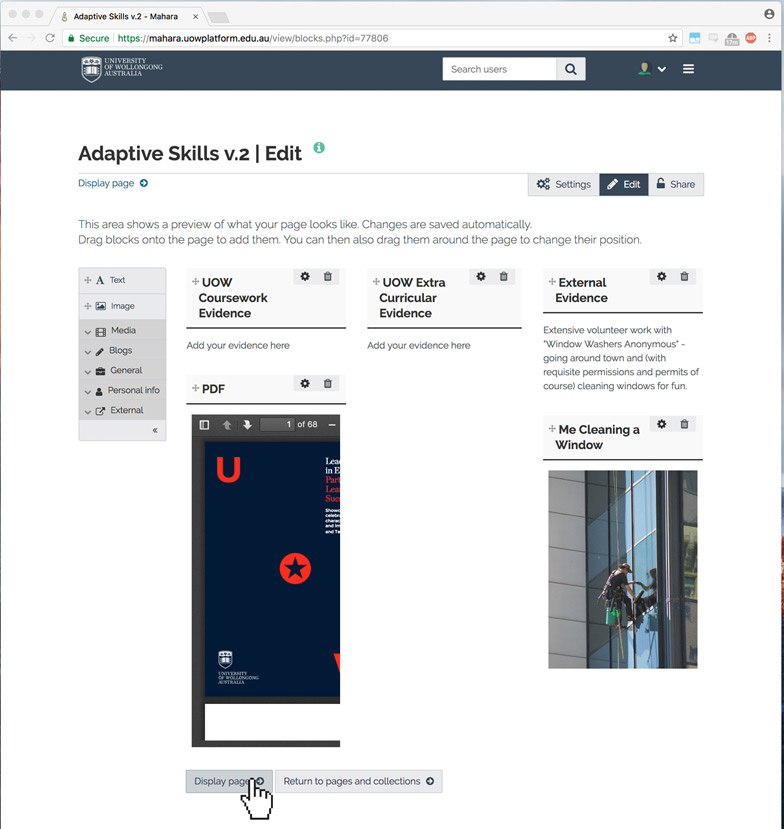
After you have added the elements, evidence, files, text etc to the page, you can click the "Display page" button at the bottom of the page to exit editing mode and see your finished page.
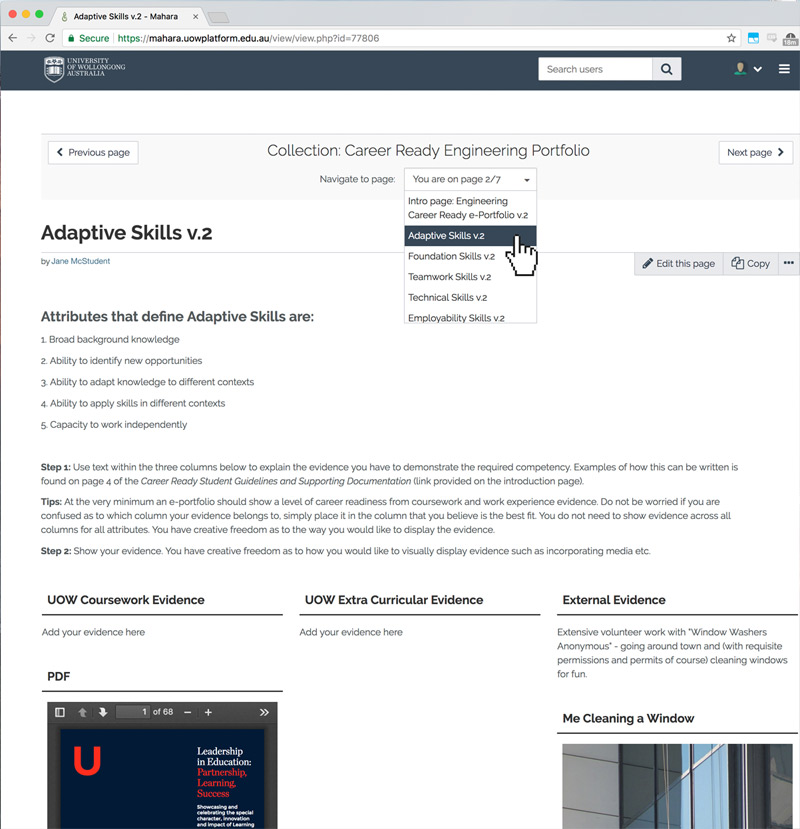
As well as using the "Next page" and "Previous page" buttons at the top of the page to navigate, you can also use the drop down menu to jump to a specific page.
The page highlighted blue is the page you are currently on. You can select another page to jump to from this menu by clicking it.
